 Credit Score Myths Busted Credit Score Myths Busted
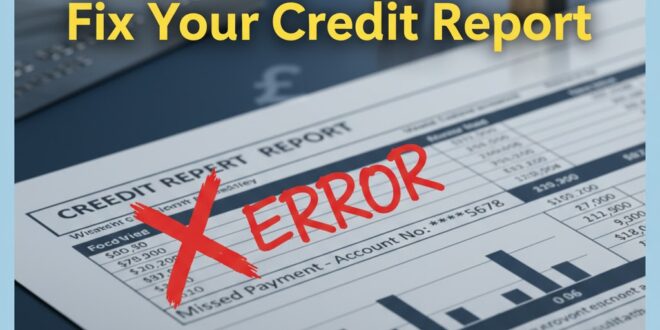
There are few financial moments more disheartening than checking your credit report and seeing an error. It could be a small typo in your address, a debt you paid off years ago still showing as active, or—most worryingly—an account you don’t even recognise. Your heart sinks. A single mistake, no matter how small, can be the difference between getting the best mortgage rate and being rejected outright.
The good news is that your credit report is not set in stone. These records are compiled from data supplied by thousands of lenders, and mistakes can and do happen. More importantly, you have the legal right to challenge any information you believe is inaccurate.
Navigating the dispute process can feel intimidating, but it doesn’t have to be. Here at Febuk.com, we believe in empowering you to take control of your financial data. This practical guide will walk you through every step of correcting an error with the UK’s main credit reference agencies, turning a moment of panic into a plan of action.
Why Even a Small Error is a Big Deal
Before we dive into the ‘how’, let’s quickly cover the ‘why’. An error on your credit report isn’t just a clerical issue; it can have severe real-world consequences. Lenders use this data to make instant decisions about you. An error could lead to:
- Rejection for credit: Mortgages, loans, and credit card applications could be denied.
- Higher interest rates: You may be approved, but offered a much more expensive rate because the error makes you look like a higher-risk borrower.
- Problems getting a mobile phone contract: As this is a form of credit, you could be refused or asked for a large deposit.
- Issues with renting or utilities: Landlords and utility providers may check your file, and an error could jeopardise your application.
- Identity fraud: An account you don’t recognise is a major red flag for identity theft and must be addressed immediately.
Common errors include incorrect personal details, accounts wrongly linked to you through a financial association, closed accounts still showing as open, or missed payments recorded incorrectly.
Your Pre-Dispute Checklist: Getting Your Evidence Ready
Before you fire off an angry email, take a breath. A successful dispute is built on preparation and clear evidence.
1. Check Your Reports from All Three Agencies This is the most important first step. In the UK, there are three main Credit Reference Agencies (CRAs): Experian, Equifax, and TransUnion. Lenders don’t always use the same one, so an error might appear on one report but not the others. You need to identify exactly where the incorrect information is held.
2. Pinpoint the Exact Error Be specific. It’s not enough to say “my credit card balance is wrong.” Note the name of the lender, the account number, the specific date of the incorrect entry, and exactly what it should be.
3. Gather Your Proof This is your ammunition. The credit agency will ask the lender to verify the data, and your evidence is crucial to proving your case. Your proof could include:
- Bank statements showing a payment was made on time.
- A letter or email from a lender confirming an account was closed and the balance was cleared.
- Utility bills or council tax statements to prove your correct address.
- If you suspect fraud, a police report number from Action Fraud.
The Step-by-Step Guide to Raising a Dispute
Once you have your evidence, it’s time to act. You should always start by raising the dispute directly with the Credit Reference Agency that is showing the incorrect information.
Step 1: Contact the Relevant Credit Reference Agency Each agency has a dedicated online portal for raising disputes, which is the fastest and most efficient method.
- For Experian: Log in to your Experian account. You can raise a dispute directly from your credit report by clicking on the specific entry you believe is wrong and following the instructions.
- For Equifax: You will need to be logged into your Equifax Credit Report & Score account. From there, you can navigate to the ‘Disputes’ section to start the process.
- For TransUnion: Log in to your account (which you might access via a service like Credit Karma or TotallyMoney). They also provide an online process to challenge any information on your report.
Step 2: State Your Case Clearly and Concisely When you fill out the online dispute form, be factual and polite. Clearly state which entry is wrong, why it is wrong, and what you believe the correct information should be. There’s no need for a long, emotional story—just the facts.
Step 3: Upload Your Evidence This is where your preparation pays off. The online portals will allow you to upload digital copies (scans or clear photos) of the evidence you gathered. This dramatically strengthens your case.
What Happens Next? The Investigation
Once you’ve submitted your dispute, the clock starts ticking. By law, the Credit Reference Agency has 28 days to investigate and give you a response.
During this period, they will contact the lender or company that originally supplied the data. They will present your claim and evidence and ask the lender to verify their information. A ‘Notice of Dispute’ will usually be placed on the item on your report, which lets any other lender checking your file know that the data is currently under review.
The Outcome: Correction, Rejection, and Your Next Steps
After the 28-day period, you will be notified of the outcome.
Success! The Error is Corrected If the lender agrees the information was wrong or cannot verify it, the CRA will amend or remove the entry from your credit report. Your file will be updated, and your credit score may change as a result. This is the ideal outcome.
The Dispute is Rejected Sometimes, the lender will maintain that their data is correct, and the CRA will reject your dispute. Do not give up. You still have powerful options:
- Add a Notice of Correction: You have the right to add a 200-word personal statement to your credit report. This notice will be visible to any lender who reviews your file. You can use it to explain your side of the story (e.g., “This late payment was recorded in error while I was in a formal dispute with the company over incorrect billing”). While this doesn’t fix the error, it provides crucial context.
- Escalate Directly to the Lender: Go to the source. Contact the lender’s official complaints department directly, presenting all your evidence. They have a formal process and are obligated to investigate.
- Go to the Financial Ombudsman Service (FOS): If you have complained to the lender and are unhappy with their final response (or they haven’t responded within eight weeks), you can take your case to the FOS. This is a free, independent service that resolves disputes between consumers and financial businesses. If they rule in your favour, they can order the lender to correct the information with all three credit agencies.
Conclusion: Be the Guardian of Your Own Data
Your credit report is one of the most important financial documents you have. Regularly checking it for errors is not paranoia; it’s essential financial maintenance. By using a service like Febuk.com to monitor your file, you can catch issues early and take swift action.
Fixing an error takes a bit of time and effort, but the process is straightforward, and the power is in your hands. By being diligent and persistent, you can ensure your report is a fair and accurate reflection of your financial life, opening the doors to the opportunities you deserve.